
A couple of students, and my mum, have asked for some insight into easing the pain in their wrists, especially in the pose of downward-facing dog. The below information should be helpful into understanding the reasons behind their pain and offer solutions to help strengthen this joint and options to get them back on the mat sans discomfort.
Wrist injuries are common in yoga, yet many of us ignore the pain and move through without knowing how to support this complex joint. Though it may seem like the injury is the result of your practice, the cause can actually lie in the imbalanced way we use our wrists in daily life.
Once we become aware of these imbalances, yoga can become a powerful tool for correcting them.
The health of our wrists depends upon the strength and tone of the muscles on the tops and bottoms of our forearms, as well as upon how thoughtfully we bear weight on our hands and wrists. Although damaging muscular tension comes from repetitive use, wrist injuries themselves are usually caused by the way we put weight upon our hands. From habitual overuse – such as typing, driving, writing, chopping, playing sports or musical instruments – nearly any activity you can think of involves lifting the arms, bend wrists back to some degree, and holding them that way. This hardens the forearm and contracts the top of the wrist joint, causing tightness and pinching between the bones at the crease of the wrist.
For most of us, the bottom of the forearm—from the palm through the underside of the wrist and forearm to the inner elbow—is chronically weak and underused. We use these muscles when we push with our hands; we use the tops of the forearms to lift our hands when bending at the wrists. In most hand-intensive activities, we rest the weight of our hands on the wrists while actively working our fingers and tops of the wrists. Over time, the imbalance in muscle tone leads to tendonitis in the wrist and elbow. But even more is at stake than just muscular tension, because the underside of the wrist is the passageway for sensitive nerves and arteries of the hand. This area is exposed and unprotected, particularly when weight rests on the wrist, and the resulting inflammation causes nerve pain and damage as well as circulatory problems.
Habits of Holding Tension
We tend to bring this imbalance into our yoga practice. For example, in a pose such as virabhadrasana II (warrior 2), we aim to keep the arms lifted and extended, thus opening the chest. No weight is placed on the hands, but holding the arms up makes the tops of the forearms and the shoulders, and even the sides of the neck, work all the harder. This effort shows itself in the fingers, which often bend upward in an attempt to stretch fully, hardening the forearms where they are already chronically tense. As is often the case, our effort to give 100 percent in a pose increases the imbalance.
To experience this feeling—and to see if it is familiar—stretch your arms to either side as in virabhadrasana II. Reach strongly through your arms and flex your fingers (not your wrists) upward. Feel how your forearms harden and your shoulders quickly tire. Even the sides of your neck begin to fatigue because you are holding your arms up from your neck. Ask yourself if you do this in your practice, at least to some degree.
We can do the pose differently, firming the undersides of the arms to provide support, thus relieving tension on the tops. In fact, virabhadrasana II can provide a constructive lesson in how to hold our arms up and extend them with the proper tone and support of the muscles on the undersides of the arms. Do the pose again, but this time, while extending through your arms, soften your wrists and lengthen through the tops of your fingers. Now bring your attention to the palms of your hands and draw energy through the palms and up to your armpits, as if breathing in through the palms. Firm the undersides of your forearms as if you were gently pressing down through your palms, and feel how your arms seem to float as your shoulder blades settle into your back. This shifts the support of your arms to your shoulder blades and the stronger muscles of your upper back—where it should be—and relieves tension in your deltoids and neck. As the tops of your hands, forearms, and shoulders soften and relax, the pose will feel lighter.
We may also bring our bad habits into poses in which the hands bear weight, and these are potentially more damaging. In downward-facing dog, for example, the majority of practitioners put far too much weight on the heels of the hands. In some cases, the hands appear almost cupped, with the mounds of the index fingers coming away from the floor. This is not necessarily the result of a lack of awareness; rather, weakness and imbalance in the forearms may make it almost impossible to bring the hands into proper alignment.
Despite challenges and misalignments, the hands are designed to bear weight. But certain parts of the hand are more suited to this task than others.
To check yourself, hold downward-facing dog for 30 seconds. Then look at the palms of your hands. The part of the palm that carried the most weight will turn red the most quickly. For many of us, that will be the heel of the hand on the little finger side. Tension in the top of the forearm causes the finger mounds to pull away from the ground, while weakness in the underside of the forearm (as well as tightness in the saddle of the thumb) makes it difficult to press through the palm firmly enough to relieve the weight on the wrist.
Correct Hand Alignment for Weight-Bearing Poses
The bones of the wrist are organized so that the strongest bones transfer weight from the mounds of the thumb and the index and middle fingers directly to the radius, which is the stronger of the two bones of the forearm. The radius in turn transfers the weight to the upper arm bone—the humerus—which sits directly on top of the radius, and thus to the shoulder girdle.
By contrast, the ring and little fingers connect to a bone in the heel of the hand called the pisiform, which you can feel as a small but prominent bump at the heel of your hand, in line with your little finger. The ulna rests on this part of the wrist; at the other end it forms the knob of the elbow. The ulna is not meant to be directly weight-bearing, but facilitates the rotation of the forearm.
The ulnar artery and ulnar nerve pass through a space just to the inside of the pisiform, protected by a small sheath of fascia. If we consistently put weight on the heel of the hand, we not only irritate the soft tissues of the wrist, causing them to swell, but risk damaging the wrist by putting pressure on this nerve. The sensitive carpal tunnel at the center of the wrist can become inflamed as well. The hand is simply not built to take weight here.
In order to protect and strengthen the wrist when the whole palm of the hand is on the floor, the greater part of your weight should be directed not to the heel of your hand but primarily to the mounds of the fingers—particularly the mound of the index finger. By pressing down through the mounds of the fingers, you are also engaging the underside of the forearm. The weight should be placed on the heel of the hand only secondarily when the whole palm is the foundation for bearing weight.
This alignment ensures proper muscular lift at the wrist, protecting the sensitive carpal tunnel, while the effort to work the underside of the forearm balances the muscle tone between the top and bottom of the forearm.
If the wrists are weak or injured, they need to be progressively stretched and strengthened with a series of exercises.
Stretching and Strengthening
Correcting habitual misalignment and stretching the wrists is a great way to start a strengthening program for the wrists. But in general, there isn’t much you can do in yoga to isolate the muscle groups and strengthen them. You can do simple exercises that strengthen the ligaments, though.
Here are a few alignment principles for the shoulders, arms and hands in almost any weight-bearing pose. These actions can first be practiced at the wall to lessen the weight bearing involved. Then, you can work your way to the mat.
- Hands placed shoulder width apart.
- Distribute the weight to the finger pads (towards the index finger side) away from the heel of the palm.
- Press all the finger pads and knuckles evenly onto the surface.
- Straighten the arms to engage the triceps and squeeze them in.
- Broaden across the upper arms and expand the chest.
- Firm your shoulder blades against your back then widen them and draw them toward your tailbone.
- Maintain your head between the upper arms without letting it hang
Wrist Curls
This can be done with 1 – 3 kg weights or with a clenched fist. Do 3 sets of 12-15 repetitions.
- Begin seated and hold two weights in each hand.
- Rest your wrists over your knees with your palms facing down.
- Slowly curl the wrists in an upward motion and pause at the top for a second before releasing them down again. Take caution not to overextend.
- Repeat the same exercise with the palms facing up.
Towel Wring
Take a dry towel and twist the towel in opposite direction, as if to squeeze the water out of it. Hold the contraction at the end for a few seconds. Be mindful of overstretching as this can aggravate your already injured wrists. Switch sides and repeat 8-10 times.
Ball Squeeze
Take a stress ball or tennis ball and grip it in your palm as firmly as possible with your fingers. Hold for 5 seconds and repeat about 10 times. Switch hands. There are a few variations you could do with a ball squeeze.
Engaging the Forearm Place your weight on the mounds of the fingers and lift energy in the palm of the hand from these three points to work the forearm correctly.
Fist Curls Stretch the top of the forearm and strengthen the underside.
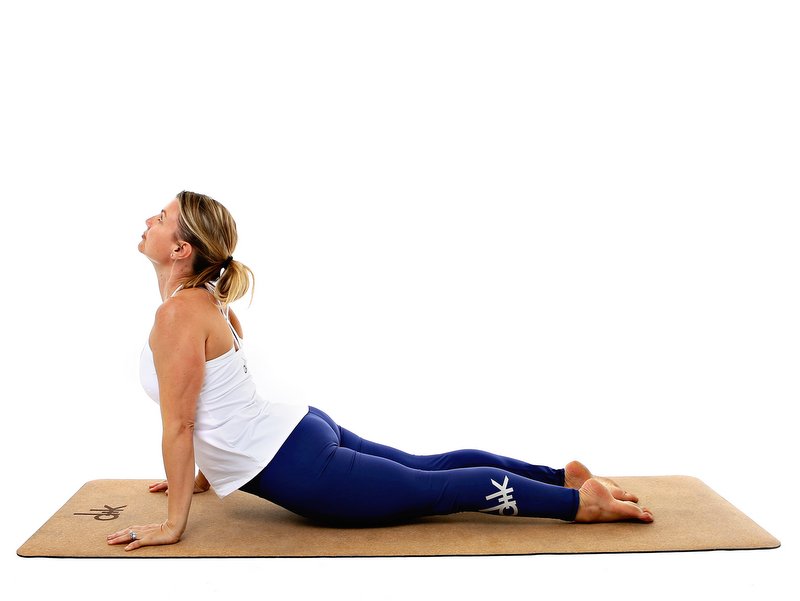
Ready for downward-facing dog
In time, you can take the exercise to the floor in the full downward-facing dog pose. This popular pose is key to learning how to properly bear weight on the hands.
Using a blanket
A folded blanket is helpful: place your palms on the floor with the blanket just behind the heels of your hands, supporting the base of your wrists. Start in child’s pose and feel how the blanket provides a lift and encourages you to keep more weight on the mounds of your fingers. When you’re ready, move to hands and knees and lift up into downward-facing dog. Watch your wrists during this transition, making sure that you don’t drop weight into the heels of your hands, which deepens the creases across your wrist joints. Once you’re in the full pose, notice that if your weight does shift to the pisiforms, your hands will begin to slide because of the lift from the blanket (sometimes even on a sticky mat!). If that happens, recenter your weight on the mounds, with the tops of your fingers soft. When you make that adjustment, your hands will remain steady and you’ll be working your forearms properly.
Be Wary
It is important to be aware of how fatigued you get while doing any weight bearing on the hands and to give yourself enough rest between poses. Good wrist strength is essential to our everyday activities and yoga can be a great tool to teach us more about how to take care of our wrists.
Thank you to – References:
1. Keller, Doug. “Healing (and Preventing) Wrist Injuries.” Yoga International. N.p, 20 June 2013. Web
2. American Academy of Orthopedic Surgeons. Tips to prevent yoga injuries, March 14, 2007.
3. Hamill, Joseph, and Kathleen Knutzen. Biomechanical Basis of Human Movement. Philadelphia: Lippincott Williams & Wilkins, 2003. Print
4. Fishman, Lauren M, Ellen Saltonstall, and Susan Genis. “Understanding and Preventing Yoga Injuries.” International Journal of Yoga Therapy, June 2009. Web